Select Virtual Tours -> Maps from the side menu.
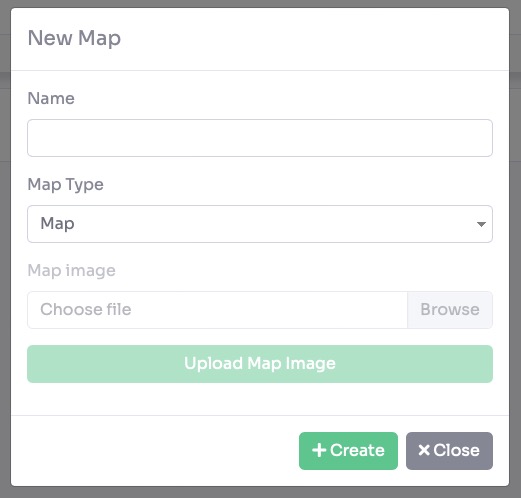
Click on the "+" icon.

Be sure to give a Name to the new plan and choose the "Map Type" as Map.
Click on Create button.
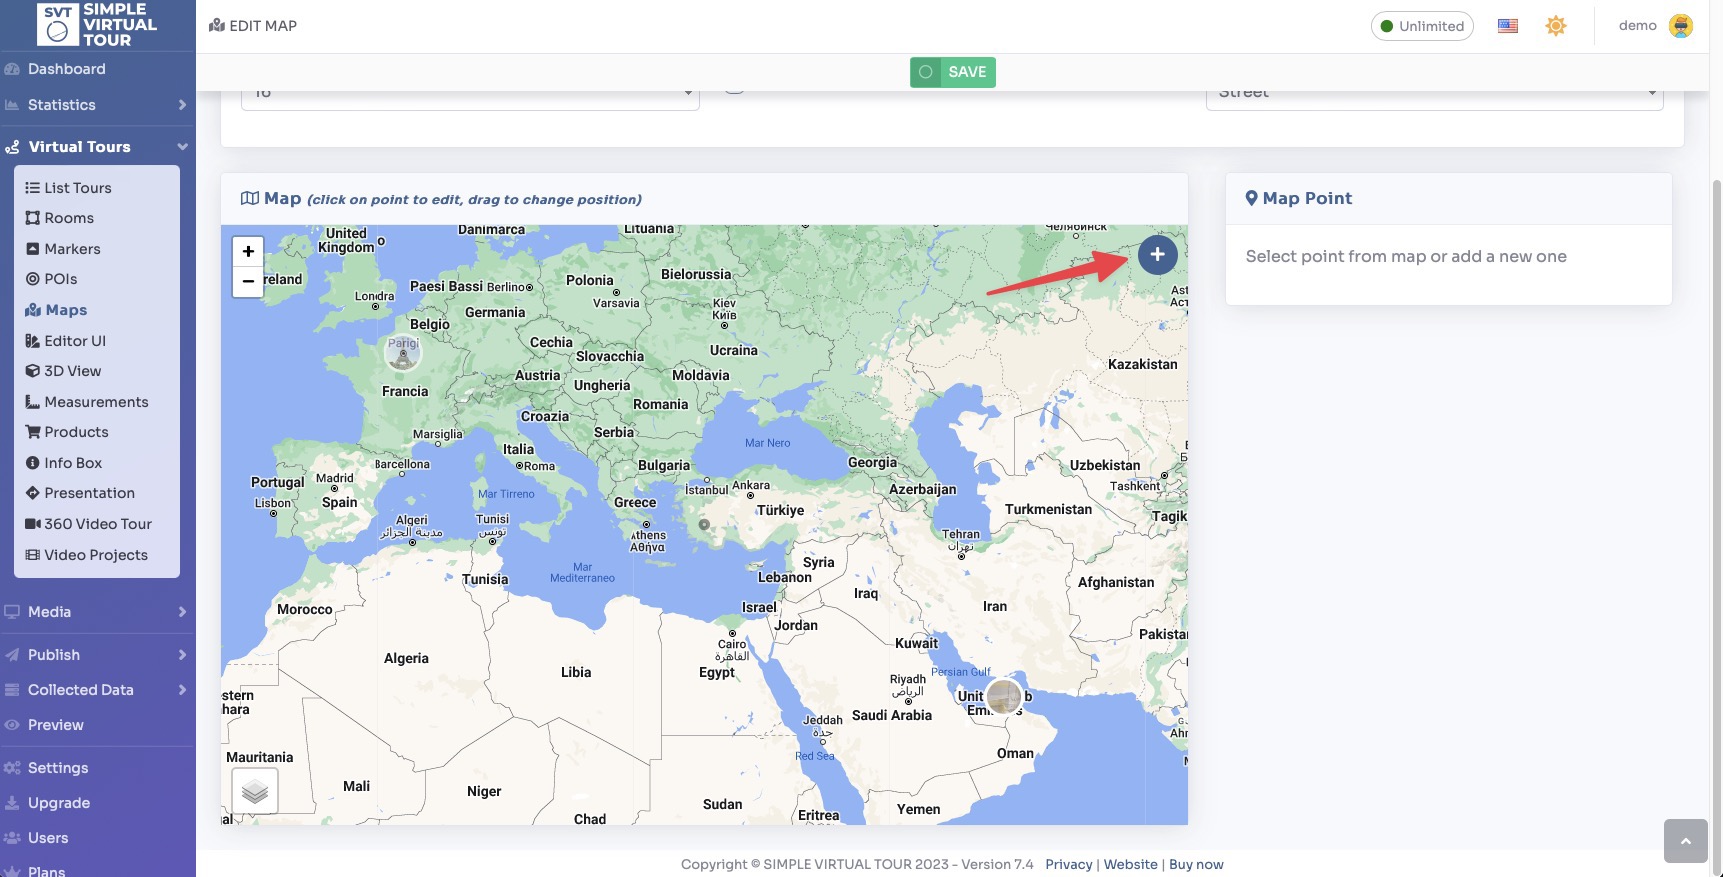
Now you will be taken to the Map settings and editing page.
The most important function is to add Point on the map, which are navigation points directing to specific Rooms.
You can add a Map Point by clicking on the "+" icon.
A new pop-up appears with the list of rooms on the tour. Select the room to add to the map and click the create button.
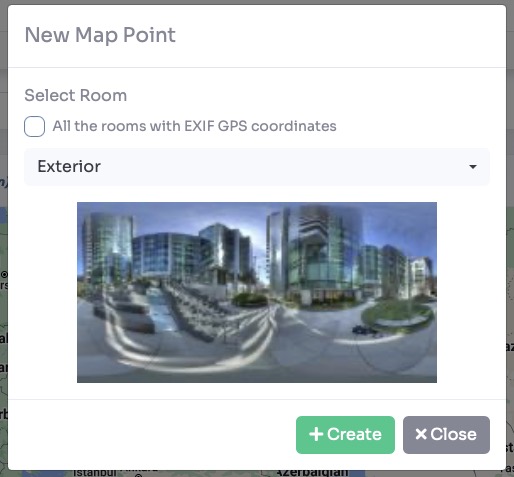
If the image uploaded to the room contains EXIF information with GPS coordinates, it is automatically placed on the map.
Select the room to add or check the "All the rooms with EXIF GPS coordinates" to place all the rooms on the map that have the GPS coordinates.
Click on "+ Create" button.
A navigation point will appear on the map: you can click on the point to remove it, change coordinates or drag the point to change its position on the map.
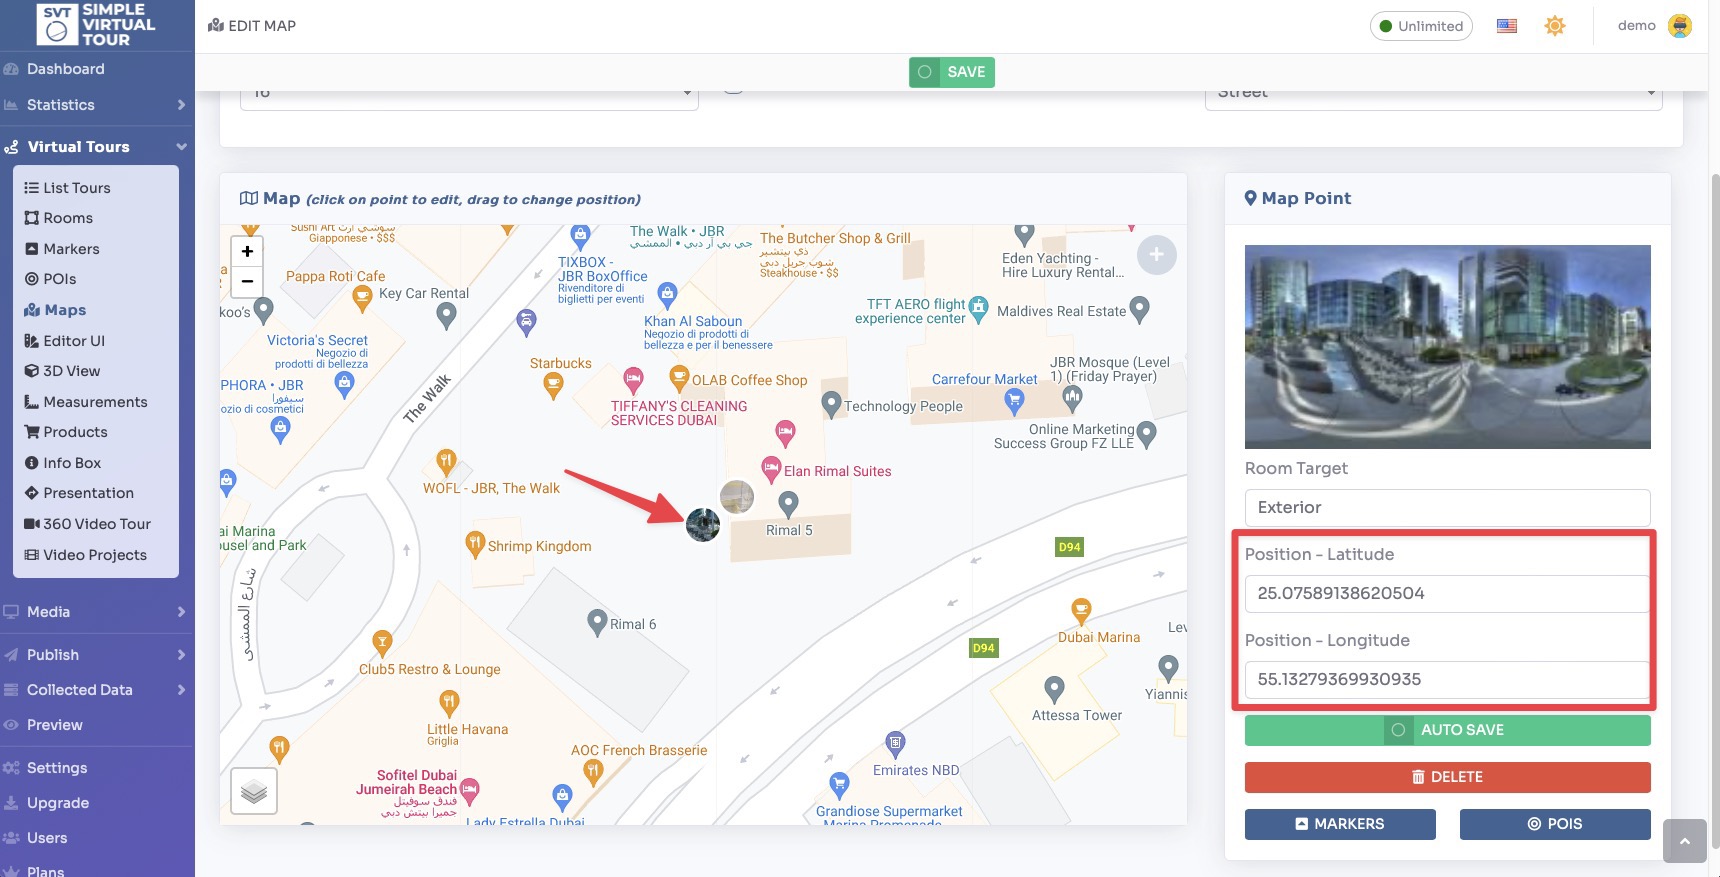
Click on Save on top of the page.
You can adjust the north position of a single room and view a preview on the map.
Select Virtual Tours -> Rooms from the side menu and click the Edit button on the desired room.
Go to tab Preview / North.
You can now rotate the view and click on the "Set" button to set the north of the room and check in the preview if the direction is correct.
Otherwise you can move the slider over the map to see in real time how the value is applied.
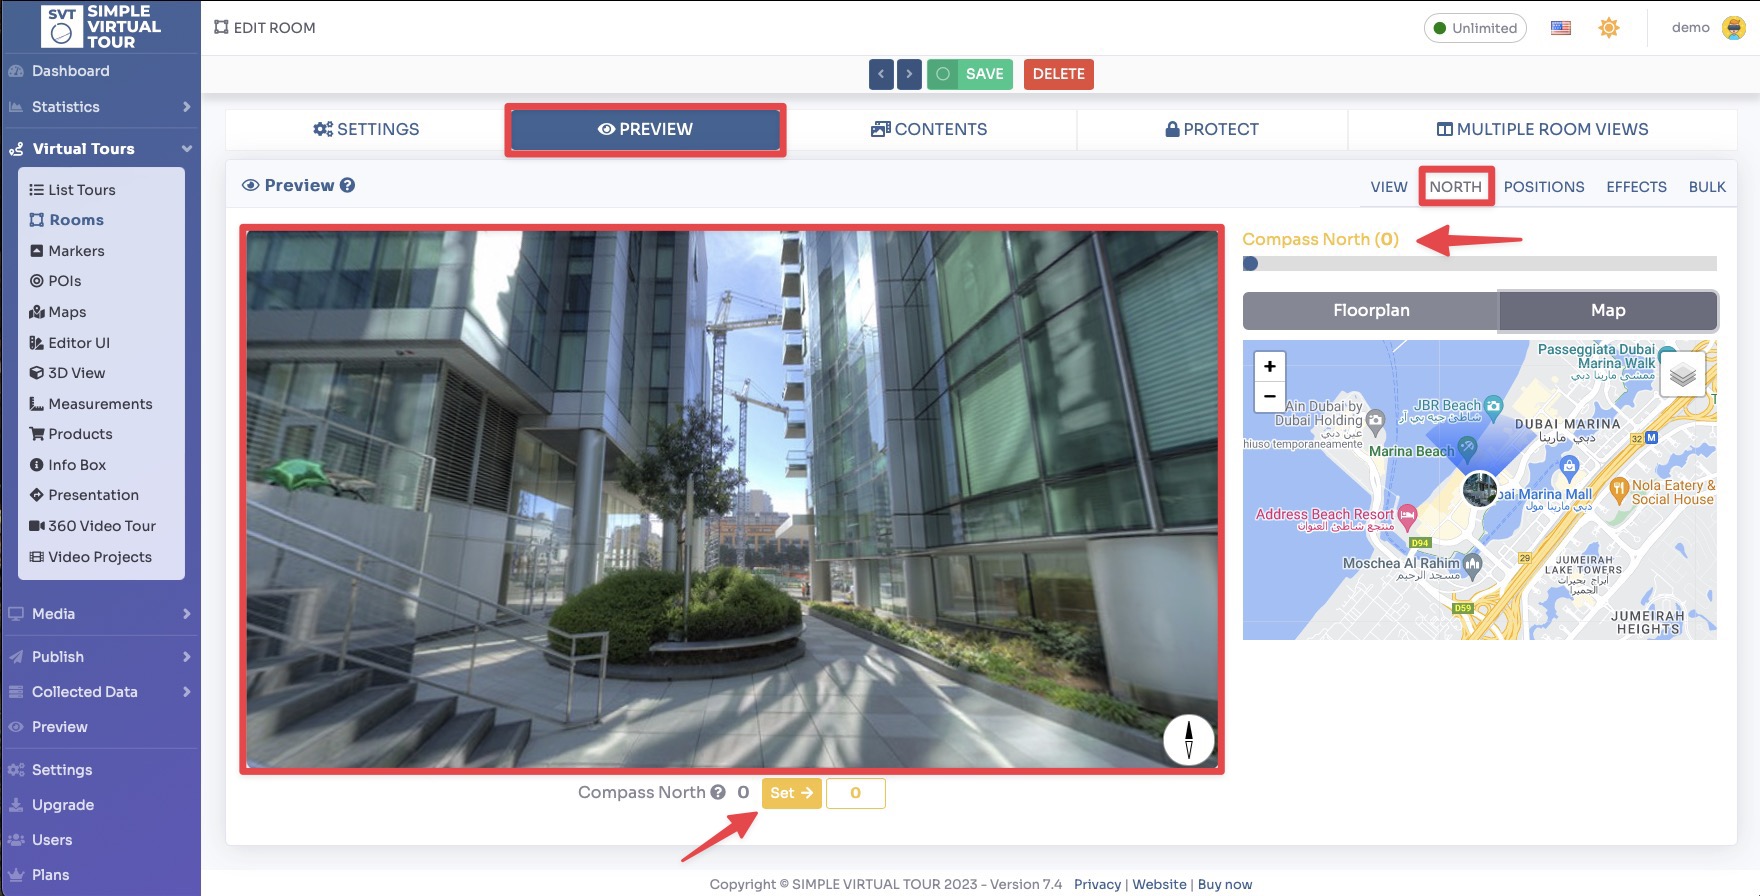
You can also set the north on all rooms by going on tab "bulk" and clicking on the "apply north to all rooms" button.
Click on Save on top of the page.
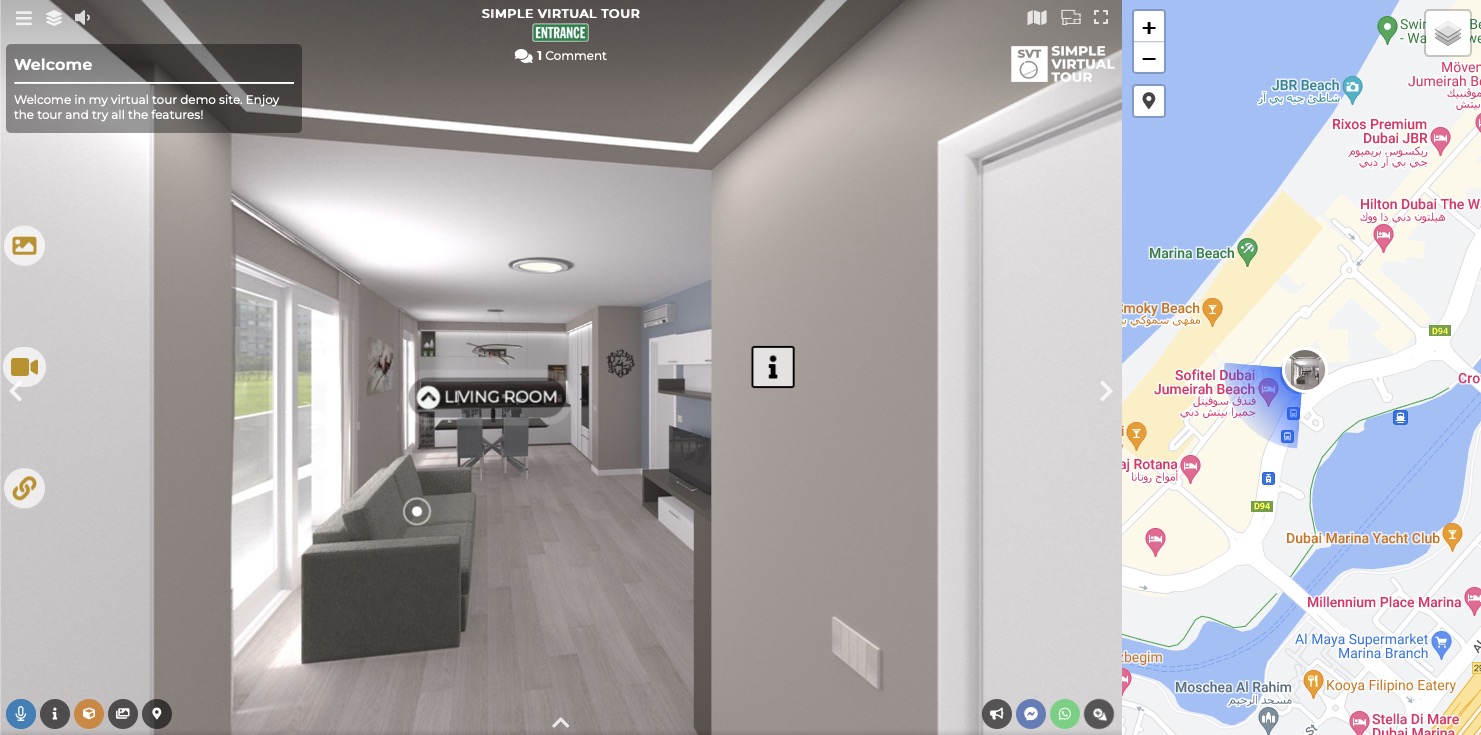
You can enable the map inside the Editor UI.
Select Virtual Tours -> Editor UI from the side menu. Click on the Map icon.
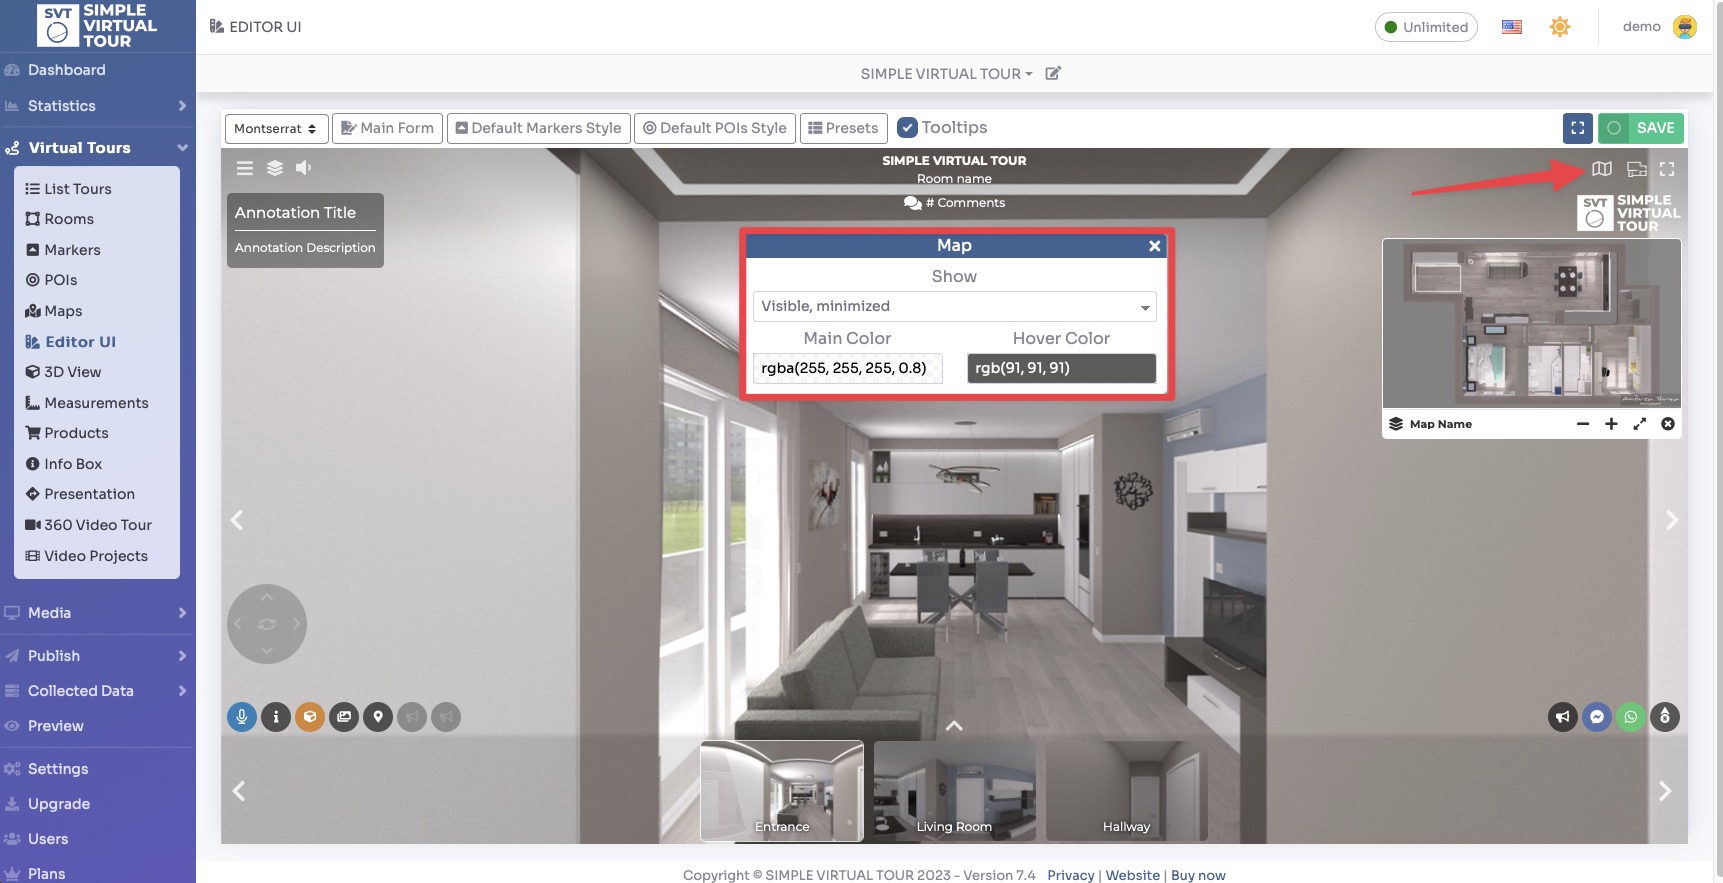
Click Save on top right corner of the page.
The map will now be shown in the tour as follows: